It is important to ensure that your PDF files adhere to accessibility standards, ensuring that text readers will be able to navigate the content of the PDF file via 'tag's within the file.
Make an existing PDF file accessible
You can utilize tools within Acrobat Pro in order to add accessibility to an existing PDF file.
- Open up your PDF file. Go to FILE>PROPERTIES
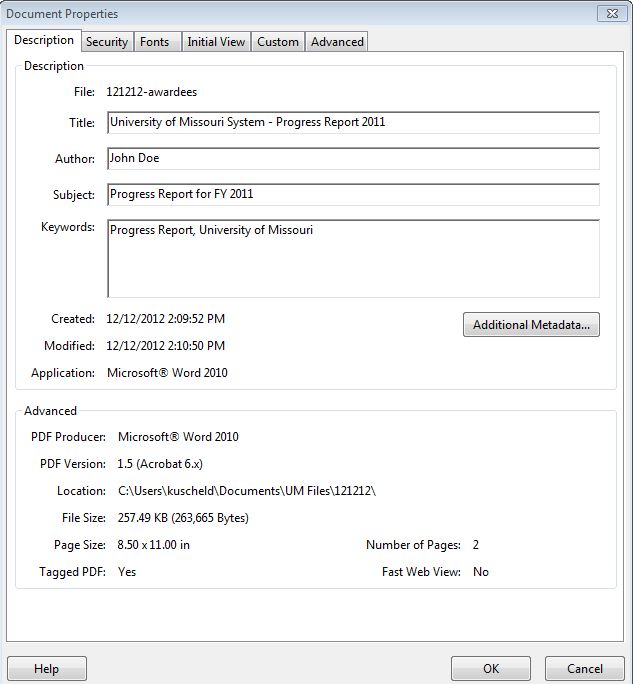
- Add appropriate content to the Title, Author, Subject and Keywords fields. The information should be relevant to the content on your file.
- Choose the Advanced tab, and ensure that the Language field is set to English.
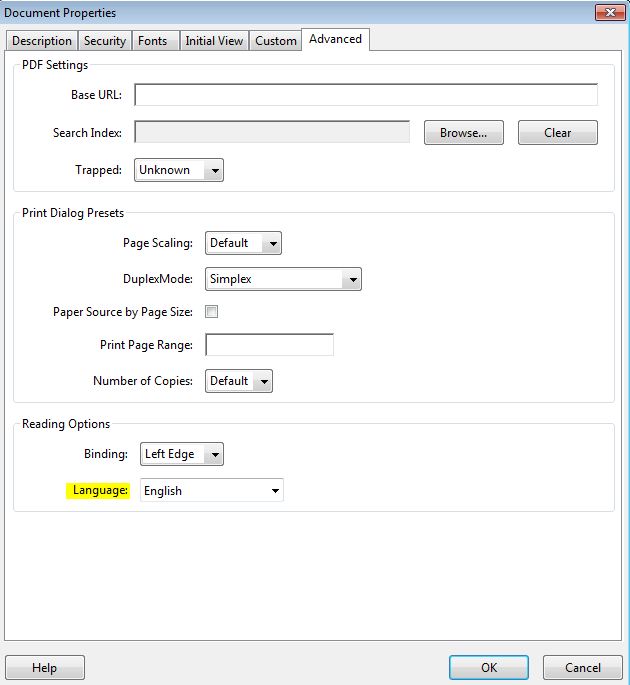
- Click on OK.
- Ensure that Tags have been added to your file: Go to the Advanced tab, choose Accessibility and then click on Add Tags to Document. If this option is grayed out, then your file already contains tags.
- Go to the Advanced tab, click on Accessibility and then Full Check. Next to the Name field, choose Section 508 Web-based internet information and applications.
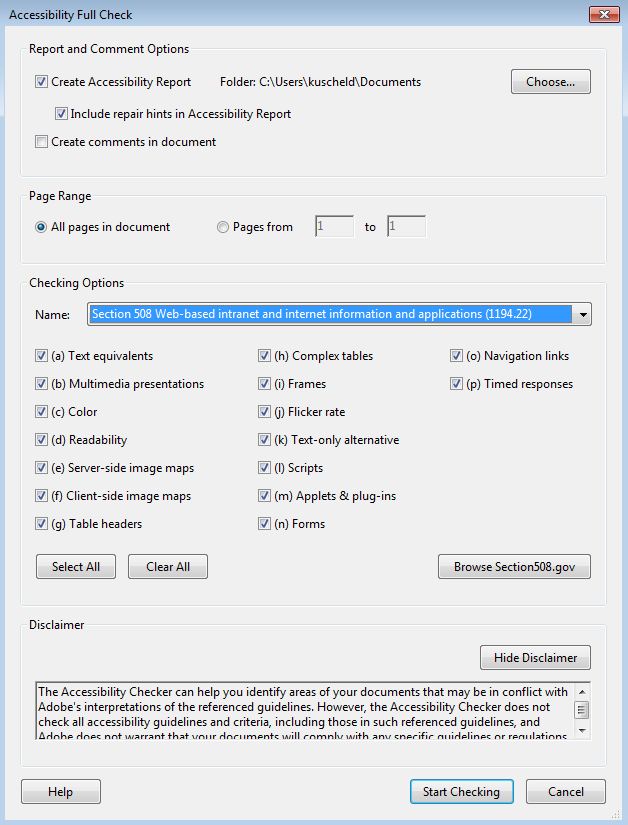
Click on Start Checking. - If the Checker finds problems, it will display a window stating as such:
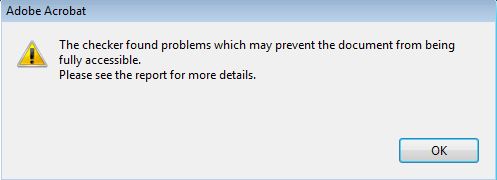
Click on OK to open up the Accessibility report. The Summary section will display any accessiblity issues that need to be corrected: this section will contain the specific problem, as well as instructions on how to fix the problem. - Once you have corrected the issues, be sure to save your PDF file.
Creating an accessible PDF file from Microsoft Word
Accessible PDF files can also be created from Microsoft Word. Please see the following site for instructions on how to do so.
Reviewed 2019-08-05